Simple Steps for Smooth Coating Dispersion Preparation
September 26, 2017
Considering everything involved with advancing a drug from discovery to a marketed product, the preparation of the film coating may seem like a simple step; just mixing powder and water. Yet it is an important step, and one of the essential steps we are regularly asked about.
Yes, you may get by with imperfect dispersion preparation; most of the time it just takes longer than it needs. But, in some cases, improper dispersion preparation can affect productivity and cleaning, and create unwelcome manufacturing headaches — which is why it’s best to get it right first time.
When it comes to good dispersion preparation, practice makes perfect and here are simple steps you can take to ensure that your coating turns out perfectly.
1. Choose the right equipment
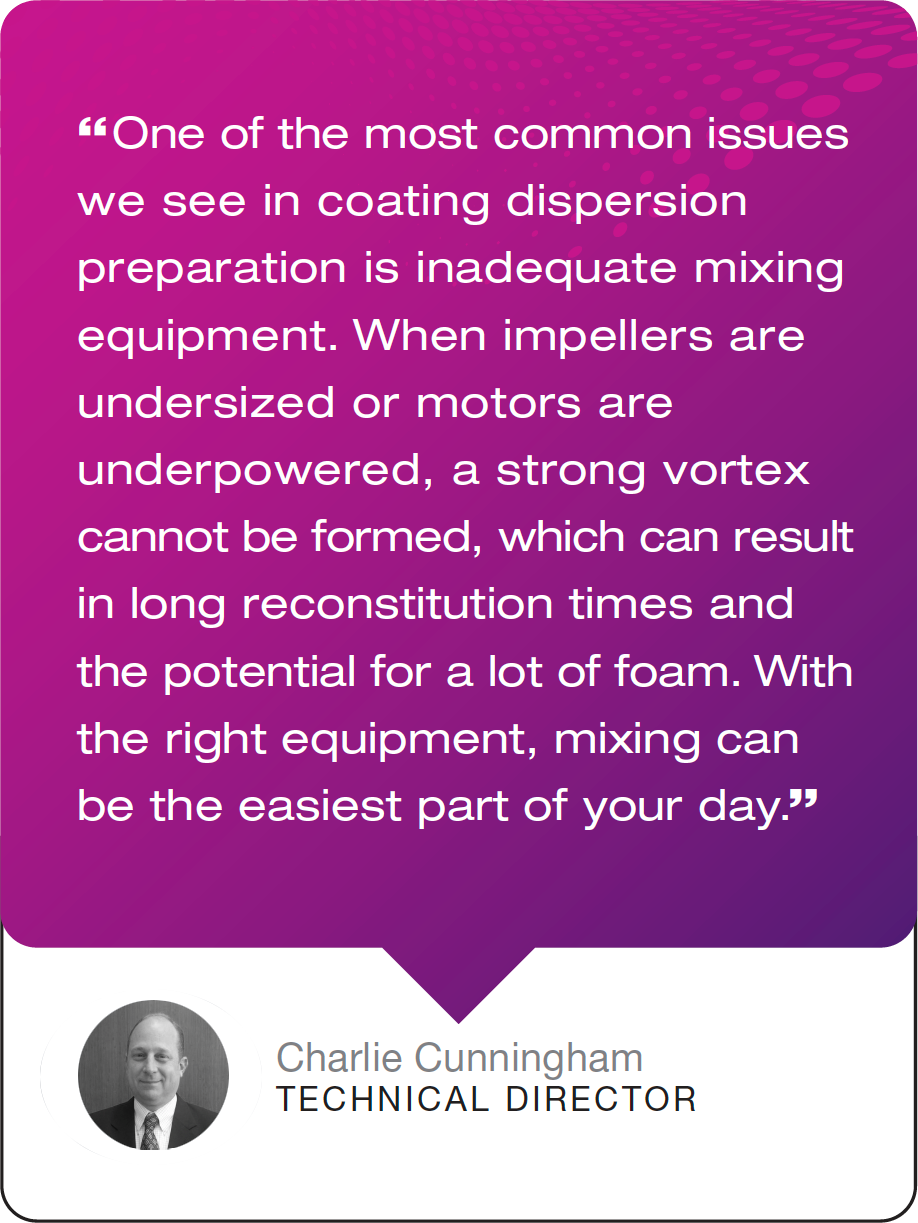
Chances are you already have all the right equipment on hand. In our experience, with equipment, simpler is better, and it’s best to avoid “over engineering” your approach. So set aside the jacketed vessels, multiple impeller shafts or high-shear mixers — they complicate the process and the truth is you just don’t need them.
Start with a vessel large enough to hold all the water and powder, and to provide space for a sizeable vortex while mixing. A good rule of thumb is to have the diameter of the vessel to be roughly the same height as the final suspension. Coating calculator >
Next, keep everything is at room temperature — vessel, impeller, water and powder. No need to heat up the water or anything like that.
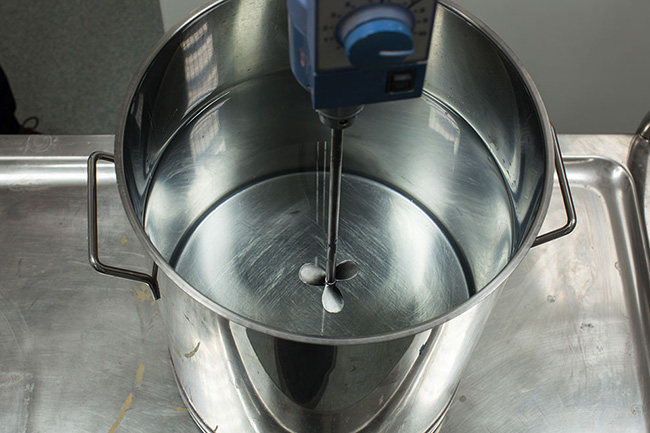
Using a variable speed low-shear mixer, select one impeller that is roughly one-third (1/3) the diameter of your vessel. You only need one impeller. If you can choose, we recommend a marine-blade impeller, as you would see on the back of a boat.
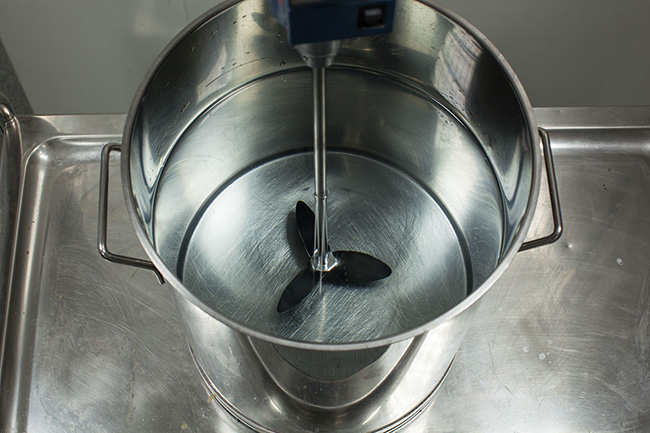
Do - Select an impeller 1/3 the diameter of the mixing vessel
Don’t - Use an undersized impeller
A high-shear mixer delivers more power than you need for successful mixing; this just creates foam and can breakdown polymer chains and pigments, changing the color and strength of the film coating.
Position the impeller as close to the bottom as possible. If the impeller is side mounted, keep the impeller on the same side of the vessel as the mounting.
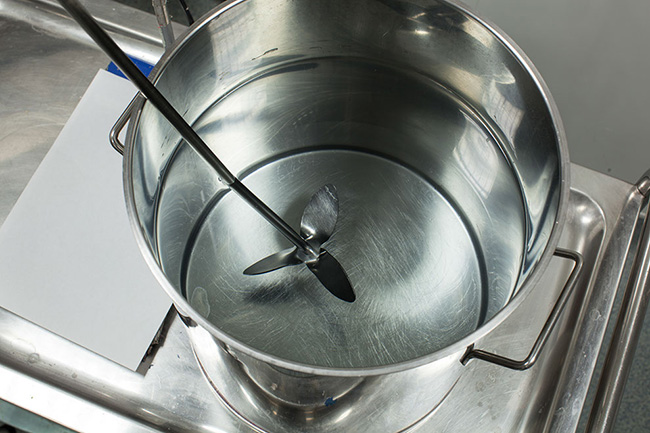
Do - Keep impeller on the same side as the mounting

Don’t - Position the impeller far away from the mounting
2. Get that vortex going
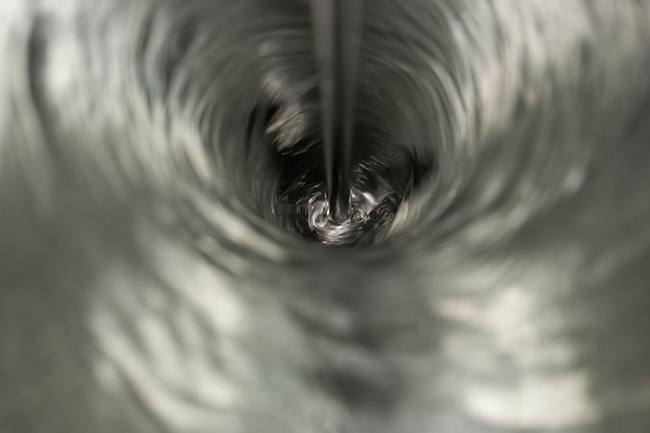
Correct Vortex
Using room-temperature water, fill the vessel and begin stirring to create a strong vortex. You should be able to see the blades of the impeller at the base of the vortex, and you should be able to hear a bubbling, gurgling sound. Back off the impeller speed just a touch—enough to bring the vortex just above the blades. This stops the “gurgle” and indicates you’re ready to start adding the powder.
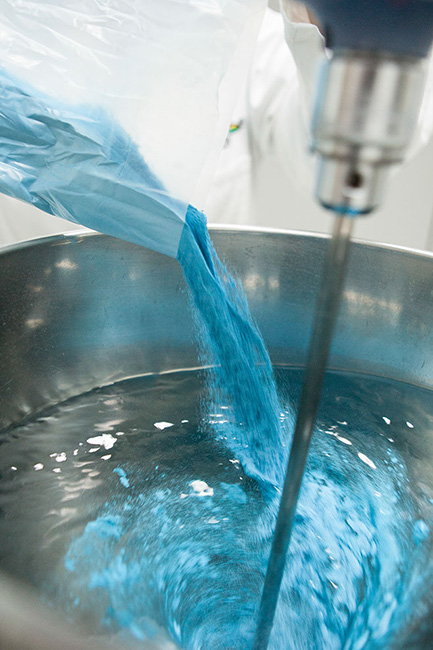
Powder Addition
Add the coating powder by pouring in a steady stream, directly into the vortex as quickly as the vortex can handle it. Ideally, you won’t have stagnant powder on the surface of the dispersion.
Another common mistake occurs by adding powder too slowly at this stage. This precaution is likely to come from past experience, when earlier coating systems tended to cake or lump. That is no longer the case with today’s pharmaceutical coatings. So pour freely with confidence; while it can create a small dust cloud, most ventilation systems will readily handle this.
So, don’t scoop, don’t sprinkle, and don’t overcomplicate this step. Simply pour. As long as you see the surface moving freely, the powder is being effectively incorporated. You may see some small lumps, but these will naturally break up during the mixing process. At production scale, most lumps are smaller than the width of a tennis or golf ball and break down during the mixing time.

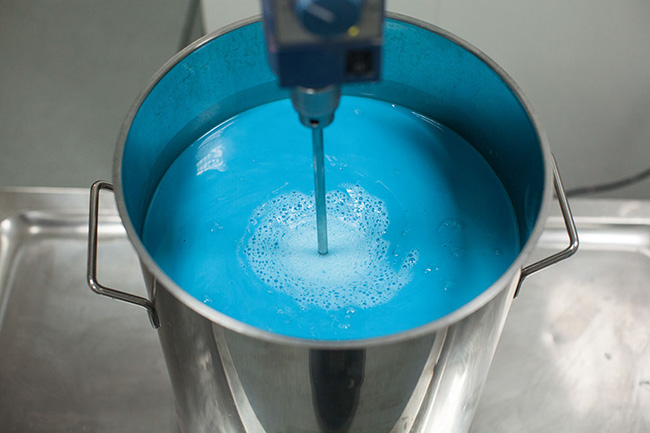
Keep the dispersion mixing
Once all of the powder is added to the vessel, slightly slow down the mixer to reduce the vortex to just below the surface. Keep the dispersion moving, preventing insoluble materials from settling. You will be ready to coat in 25 to 45 minutes, depending on the coating formulation.
3. Start spraying and watch it work
As you remove liquid from the mixing vessel during the coating process, it’s important to keep watch on your coating suspension to ensure the vortex doesn’t become too strong as the level of drops and begin to entrain air into the suspension.
Reduce speed if foam begins to appear
Excess foam will make the suspension harder to spray and can result in a dirty pan and clogged filters. Should you see foam starting to form, simply turn down your mixer. A little foam is okay, and completely normal, but more than a few inches can cause a problem. As liquid is removed from the vessel, the liquid level will move closer to the base of the impeller; at this point you will need to slow down, or even turn off, the impeller to avoid over production of foam.
When it comes to measuring the coating rate, Colorcon recommends putting your coating suspension vessel on a load cell and monitoring the weight of the vessel, as opposed to relying strictly on flow meters. Flow meters sometimes can produce erroneous readings, especially if foam is present. Weight will always provide a true reading of how much product is used.
Preparing the coating suspension is a simple process that improves with practice. And practice makes perfect.
At Colorcon, our goal is to help our customers make every tablet a perfect tablet, every time. Perfect film coating is best achieved when we connect with you early and understand first-hand the challenges your formulation, coating and manufacturing process may present.
